Thursday, October 14, 2010
Auction
The storage bin that I decorated will be auctioned on November 6th. Visit the museum's website for more information and to see the rest of the bins. There are many talented artists included in this auction, and I am honored to be one of them. I am also happy to help out The Maine Discovery Museum.
Monday, August 30, 2010
Summer Project Continued


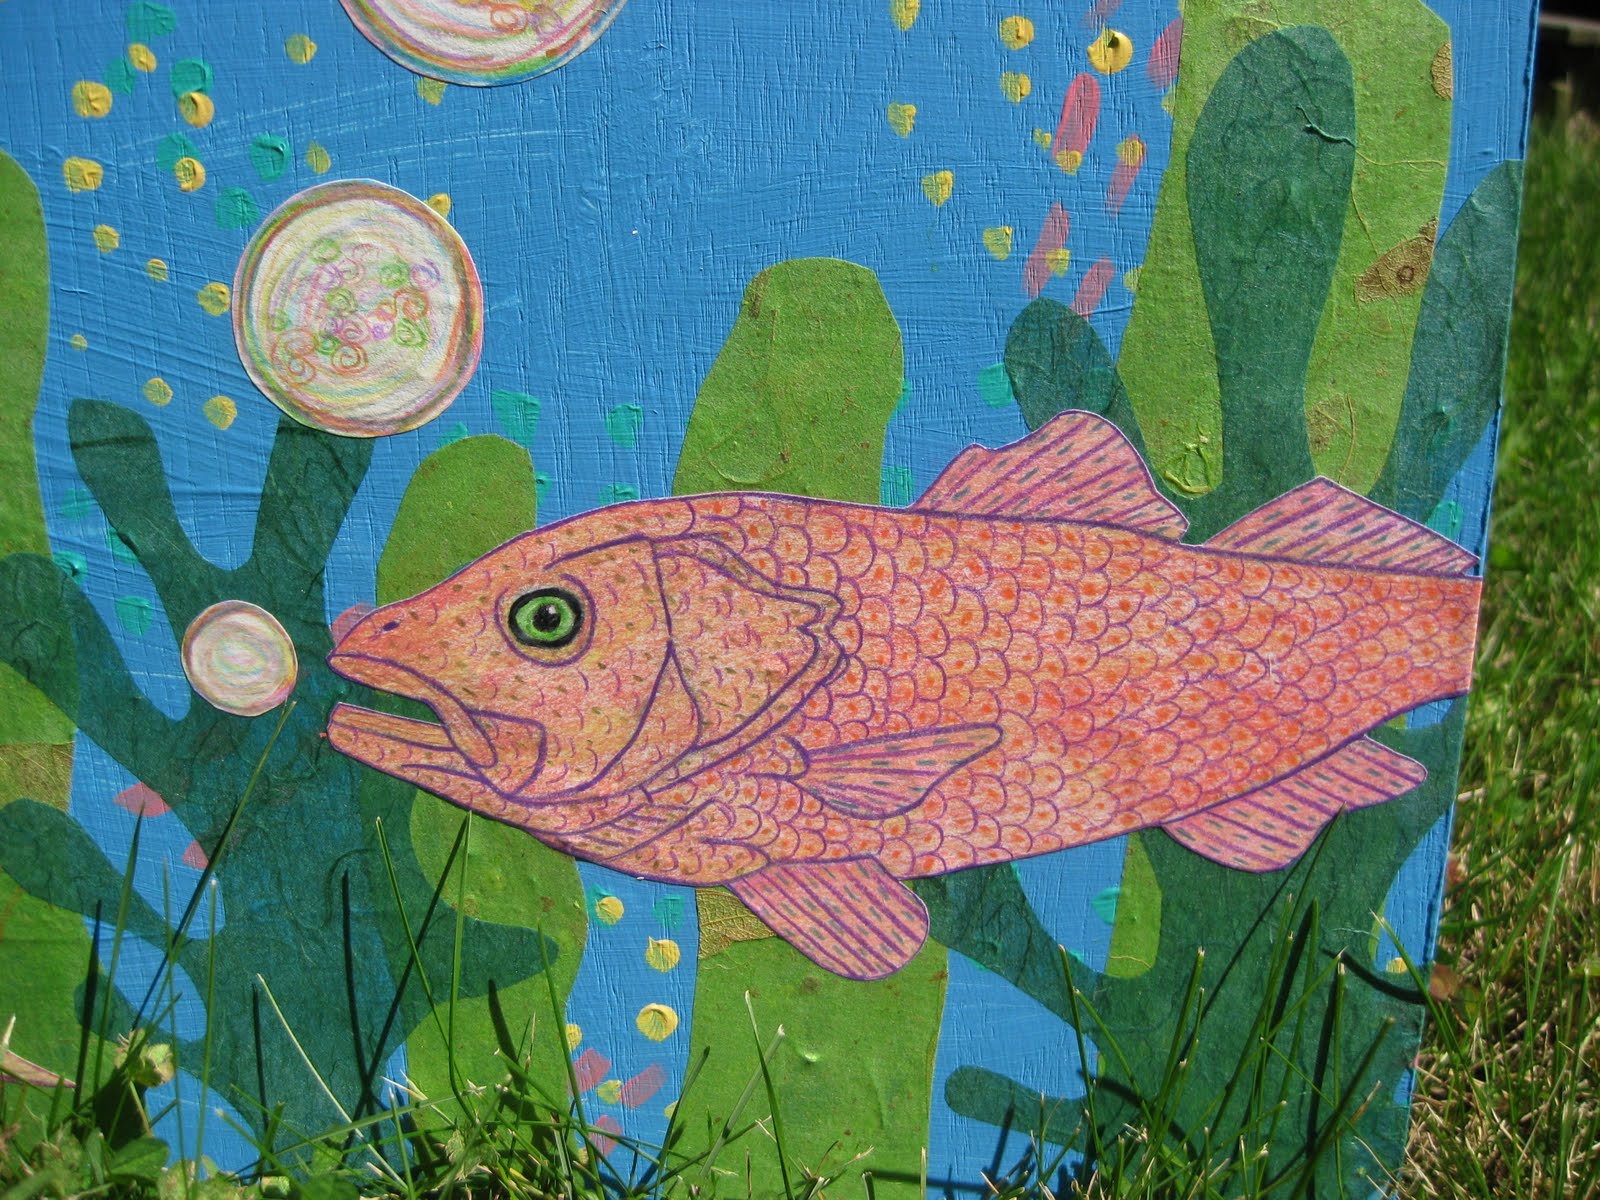

 I decorated this wooden bin for an auction to support a local children's museum. I first primed and painted the box. I used a combination of a couple of different blue paints with some green and white. I then added some designs with yellow and pink. On top of the paint, I cut out and glued on seaweed and clouds using decorative paper. I drew fish and bubbles on drawing paper with colored pencil, and then cut those out and glued them on. I created a quilled paper design on one bubble on each side of the bin. I added a clear coat over everything. The finishing touch was to glue clear acrylic coasters over the quilling to project the designs.
Summer Project
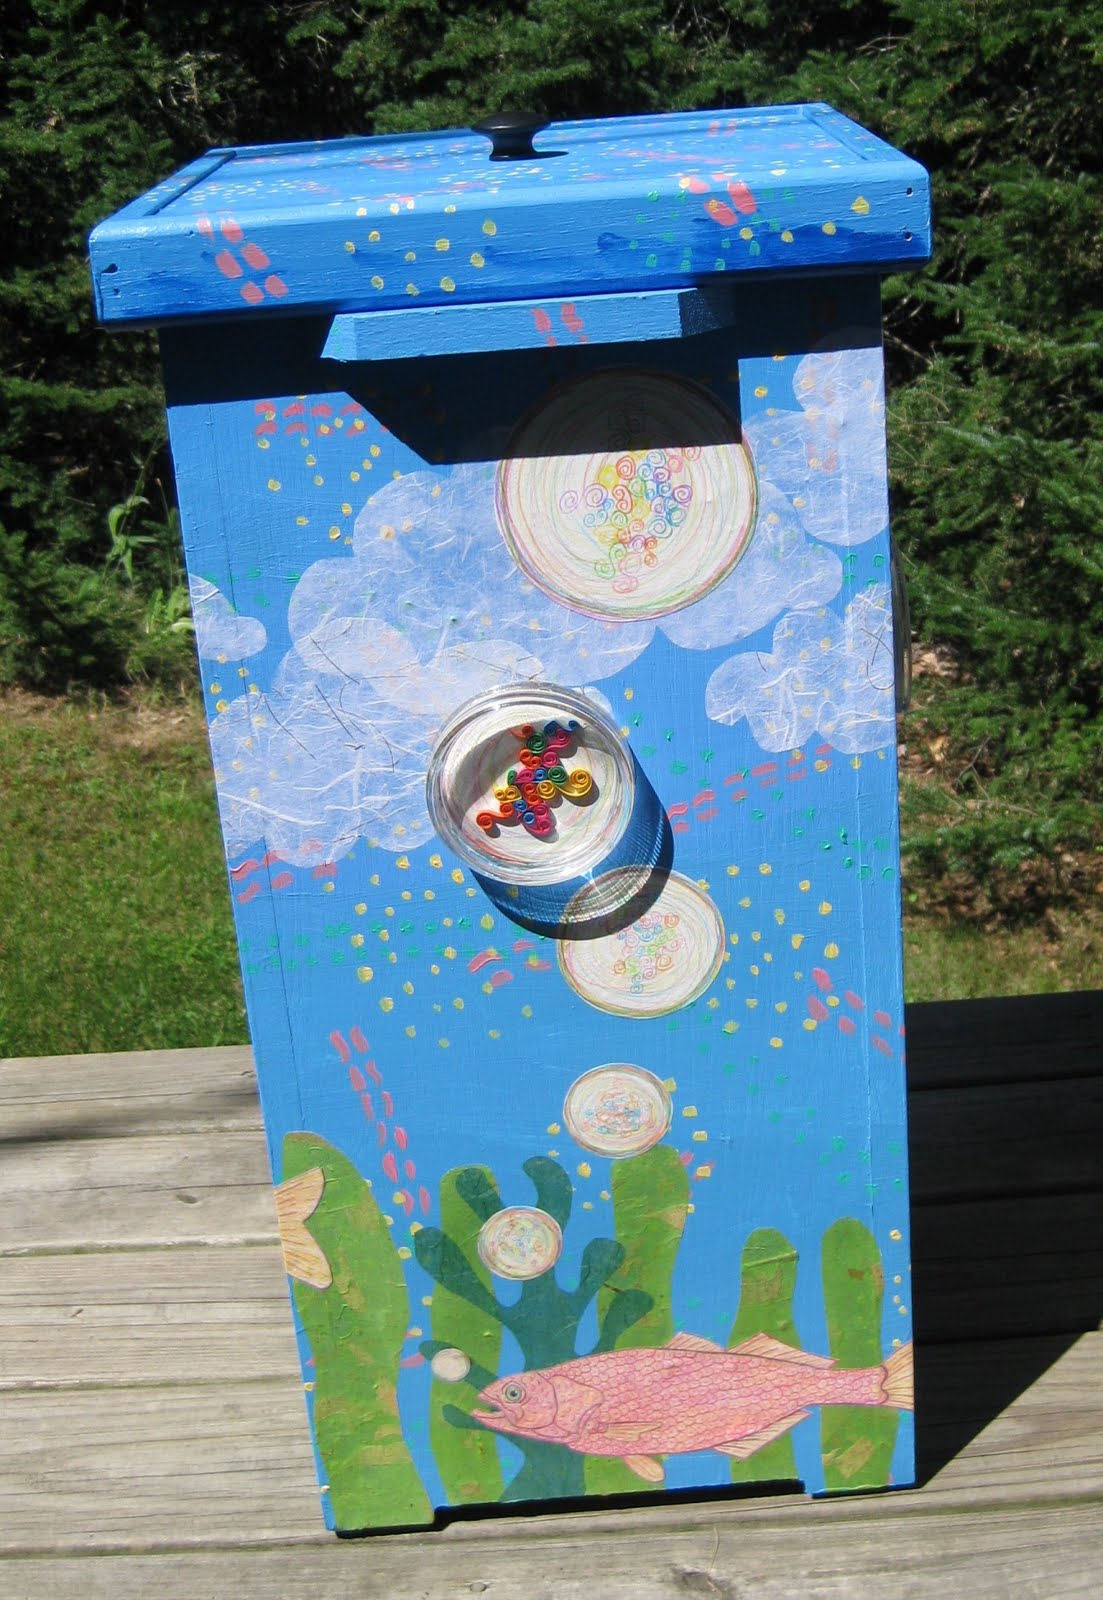


 I was asked to decorate a storage bin for the local children's museum (The Maine Discovery Museum in Bangor). They asked a variety of local artists to turn the wooden bins into works of art which they will auction off in November to raise money for the museum. I had my little baby boy on July 20th, so this is the only project I have completed this summer!
Monday, June 21, 2010
Nursery


We are expecting our baby boy in less than a month! Here is a look at the nursery, although it is still a work in progress. I put a couple of quilled pictures on the dresser, but they will probably end up being hung on the wall.
Monday, May 31, 2010
Another Simple Card

Here is another card I made using collaged scrapbook paper and a simple quilled butterfly.
Sunday, May 23, 2010
Simple Card

Here is a simple card that I made to brighten someone's day. I had some cute patterned scrapbook paper, so I did a little collage. Then I added a simple quilled bird that I had made the other day.
Sunday, May 2, 2010
Slow and Steady


I have mostly been working on some greeting cards, but I have found a little time to continue with my trees. It is going to take A LOT of leaves to finish this the way I want it, so I think I will just work along at a slow and steady pace and not worry about when it gets finished. I decided to focus in on just one tree for now, so that I could see the progress a little easier. I like that I have been able to build up two layers of leaves for added dimension.
Saturday, April 24, 2010
Autumn Trees - continued but not finished!
 I made quilled tear drop shapes for the leaves. Some are made with one color and others using two. There are a variety of different shades of green, brown, red, yellow and orange. More leaves to come!
Autumn Trees - Work in Progress
 It was too nice of a day to stay inside, so I took my drawing materials and a tray table outside! I started with simple and unsophisticated drawing materials: blank index cards and ball point pens.
I created three different trees and then combined the drawings into one.


Wreath Card


This card was made for a special family member. I started with a little bit of collage before adding quilled shapes for dimension.
Tuesday, April 20, 2010
Flower card


Monday, April 5, 2010
Baby Girl Art


This project was made as a thank you gift for a friend for her little girl's bedroom. I really had a lot of fun making this! I am very happy with how it came out. Hopefully her baby girl will enjoy it!
I would like to make more of these personalized projects and have added a listing to my Etsy store.
Saturday, April 3, 2010
For Our Baby Boy


This was the first project that I made for our baby boy's nursery. He isn't expected to arrive until July, so I have a feeling that I will be making other projects for his room before then! I had a lot of fun creating the animals, even though they didn't not always come out the way that I wanted on the first try.
Hopefully Luke will like it!
Saturday, March 27, 2010
Counting Sheep - Version 2


Here is the second version of the counting sheep theme. This one will be for sale at my Etsy store. Hopefully it will promote sweet dreams in someone's bedroom!
A word about frames:
I have found that quilling projects can be difficult to frame because most frames are designed to hold flat objects. I considered using shadow box frames, but they are too deep. I found this frame and one other that have a built in mat. There is the perfect amount of depth between where the picture goes and the glass because these mats have a sculpted inner edge. Now I just have to buy a few more for my next quilling adventures!
Sunday, March 7, 2010
Etsy Store
My Etsy store is now up and running. I will be selling some of the items featured on this page. Take a look and let me know what you think!
Counting Sheep


This creation is for a friend who is expecting a baby next month. I had a lot of fun designing and creating it, although each sheep took me forever to make! Hopefully she will like it!
Saturday, March 6, 2010
New Pendant

THIS ITEM IS CURRENTLY FOR SALE ON ETSY! I created a new pendant that I plan to make into a necklace. This design reminds me of peacock feathers.
Two New Boxes


THESE ITEMS ARE CURRENTLY FOR SALE ON ETSY! I have created two new gift boxes. This time I decided not to paint the boxes and left them as they were. I focused on making abstract, more geometric designs for these projects.
Saturday, January 30, 2010

Gift Boxes


THESE ITEMS ARE CURRENTLY FOR SALE ON ETSY! I had a couple of jewelry boxes left from Christmas gifts, so I decided to put them to good use! I painted them both gold and then added a quill design on the top cover of each. I used an acrylic varnish to seal everything.
Subscribe to:
Posts (Atom)